For any renovation, you need a clear design and plan to ensure the project stays on track. One tool that can help you is a mood board—it visually captures the essence of what you’re hoping to build! Learn how to create a mood board that keeps your creative project focused with these tips.
What is a mood board?

A mood board is an excellent starting point in any design process. At its core, it’s a collection of images that captures the essence of a concept or idea before any final design choices are made. However, as you’ll discover later in this article, you can add anything from textual descriptions to physical samples to make a mood board that works for you.
Ever heard the adage, “a picture is worth a thousand words?” It explains why a mood board is such an effective tool for a renovation project. Rather than trying to tell a contractor what you want in words, a mood board helps you gather your thoughts, narrow your choices, and communicate your creative vision in seconds.
Benefits of using a mood board
It fuels your creativity and provides you with endless inspiration.
It’s a great way to research current trends and industry standards that may impact your design.
It helps you figure out the style, energy, textures, purpose, and colours of a space before you begin your home upgrade. In an instant, you’ll see if something doesn’t work.
It helps you communicate with your contractors. You may not know the industry terminology to describe what you want, but you can capture the feeling with a collage of images, textures, and samples.
It saves time and money by ensuring your project kicks off in the right direction.
It keeps your revamp on track as you have a visual reference whenever decisions must be made. A blank canvas can be overwhelming!
It ensures that no detail is forgotten. From large furniture pieces to the colour of your hardware, a mood board helps you choose the right aesthetic.
How to create your mood board in 6 steps

1. Pick a format
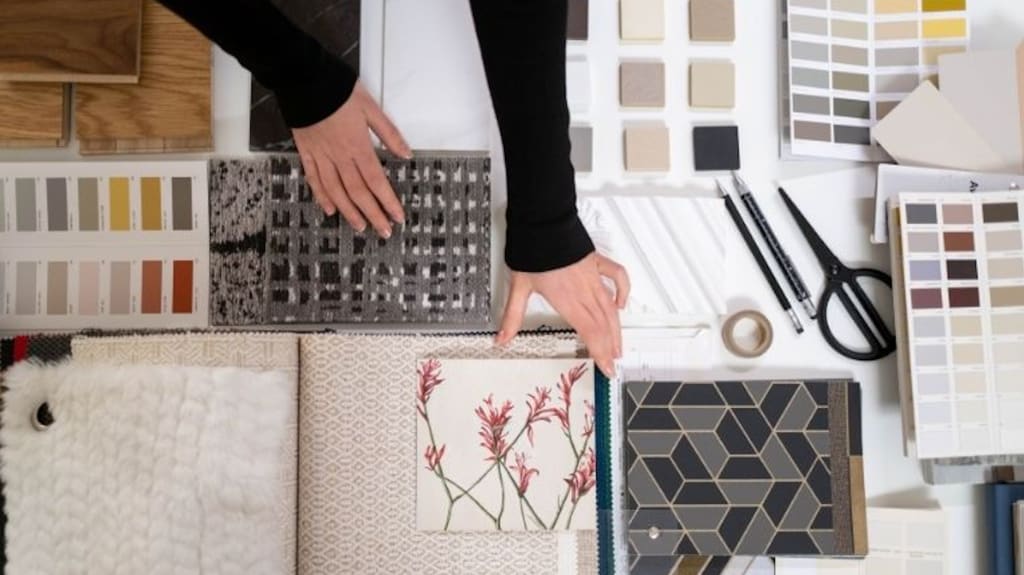
Would you prefer a physical mood board or a digital format? Which format will inspire you more? The choice is entirely up to you. A physical mood board can seem old fashioned, but working with something tactile could be more inspiring and immersive for you. Include printed images, colour swatches, material samples, and anything else that helps convey your vision.
If a digital mood board is more your style, there are several user-friendly tools available to help you, including Pinterest and Canva. The basic version of Canva is free and allows you to upload images to a customizable template. You can also browse the library of free images or upgrade to the premium package for a wider variety of features. Plus, you can download and print or share your digital collage with others.
With Pinterest, you can create Pins using images found online and save them to boards that best fit the themes you’ve chosen. For example, if you are collecting ideas for a Scandi-inspired bedroom, you can save images of rooms, colour schemes, furniture, and accessories in one place. Pinterest also learns what kind of images you like and suggests other ideas that will suit your topic.
Similarly, if you have Instagram, you can bookmark inspiring posts and save them under different collections or folders on your profile. Even if you choose to make a physical mood board, Instagram and Pinterest are a great first step in collecting and organizing images that suit your theme.
2. Start with your hero piece
If you’re unsure how to begin your mood board, consider the room you’re renovating. Is there a large item (e.g., a couch or bed) that you know will be used in the space? Use this piece to set the tone and build your design from there, adding other complementary visual elements.
3. Collect your imagery
How do you want to feel each time you walk into the room you’re renovating? Do you want to create a vacation vibe at home? Which colours and textures would help evoke that feeling? Do some research and then gather as many images as you can from a variety of sources, including magazines, Pinterest, Instagram, illustrations, movies, books, or even packaging.
The trick is to not think too much and simply grab anything that catches your eye. Also, don’t just opt for literal interpretations of your theme. For a mood board of a Bohemian-style living room, you could easily include images of baskets, rattan lampshades, and macrame wall hangings. However, vibrant patterns, layers of brightly coloured fabrics, and a sprig of dried pampas grass would also work well.
Ideally, your mood board should include images that represent the overall theme of the room, colour palette, furniture (what you already own and anything new you might add), hardware, artwork, flooring, light fixtures, décor, and window treatments.
4. Evaluate
Look at the images and material samples you’ve collected and assess what works and what doesn’t. Does the furniture you plan to buy work with what you already have? Rely on your gut during this process and edit as you see fit. Group things together and play around until your mood board is an accurate reflection of what you envision. Don’t include too many design elements, though. Around six to 12 should be enough to communicate your idea.
5. Add text if you need to
If you find it easier to communicate with words, feel free to include notes that can help get your point across. Short descriptions that highlight important details or explain images can be helpful if you’re working with a team of contractors.
6. Finalize your design
A mood board is an effective way to see if your ideas work together because all the elements are side by side in front of you. The result should be a cohesive look that includes the smallest details and finishing touches. Be honest and decide if it evokes the feelings and emotions you had in mind. If it doesn’t, go back and tweak it by swapping out elements until it feels just right.
Above all, take your time and have fun with it. It’s better to make mistakes or find issues early in the process than later once money has been spent.
You can never have too much inspiration. Get your fill of ideas by browsing our Inspiration section.


